
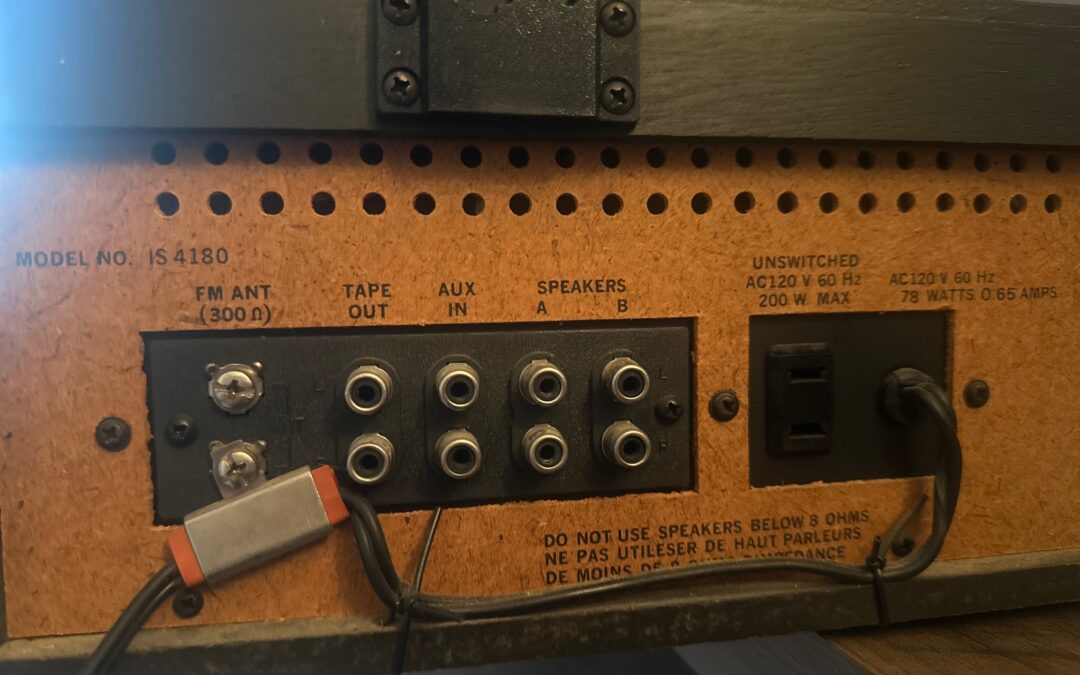
You pull out a vintage stereo from storage. You plug it in. Nothing happens. Or it powers on, but there’s no sound. Or the sound is crackly and weird.
Your first thought: it’s broken. Time to take it somewhere for repair.
But here’s what I see 30 percent of the time in the first few minutes of a diagnostic: the equipment isn’t broken. It’s dirty.
After 45+ years, I’ve learned that vintage stereo maintenance is half the battle. A lot of “broken” vintage equipment just needs cleaning. And a lot of that cleaning you can do yourself.
Dust Is the Invisible Enemy
Dust gets everywhere in vintage electronics. It coats circuit boards. It clogs cooling vents. It gets inside potentiometers and switches.
When dust coats a circuit board, it can block heat dissipation. Components get hotter than they should. Performance degrades. Sound gets weird. The equipment might even power down because internal temperature sensors detect overheating.
When dust clogs cooling vents, the same thing happens. Heat builds up. The equipment shuts itself down to protect the components inside. You think it’s broken. It’s not. It’s protecting itself from overheating.
When dust gets into potentiometers (the knobs that control volume, treble, bass), you get crackling or intermittent sound. The dust creates a resistance layer. When you turn the knob, it scratches against the dust and creates pops and crackles.
Corroded Connections
Vintage stereo equipment sits unused for years. Corrosion builds up on every connection: RCA jacks, speaker terminals, power cord connections, internal solder joints.
Corrosion is an insulator. It prevents electrical connection. A corroded RCA jack will accept a cable, but no signal passes through. You think there’s no sound because the equipment is broken. It’s actually a broken connection at the jack.
This is one of the easiest “repairs” for vintage stereo maintenance. Clean the connection. Plug the cable back in. Sound comes back.
Dead Capacitors vs. Dirty Equipment
Here’s the diagnostic question: is your vintage stereo broken or just dirty?
If it powers on but sounds wrong, it’s probably dirty. Crackling, no sound in one channel, weak output, weird frequency response. These usually point to dirty connections or dusty circuits.
If it doesn’t power on at all, that’s usually a real failure. Dead capacitors. Blown fuse. Internal damage. That one’s not a cleaning fix.
If you’re not sure, assume it’s dirty first. Clean it. See what happens. Worst case, you did some preventive maintenance and the equipment is cleaner than when you started.
How to Clean Your Vintage Stereo Safely
Compressed air first. Never use a vacuum. Vacuum creates static electricity, which can damage sensitive electronics. Use compressed air cans. Blow out dust from cooling vents, fans, and ventilation holes. Do this outside or in a garage so the dust doesn’t blow around your living space.
Soft cloth for the exterior. Use a dry microfiber cloth or soft cotton cloth on the outside casing. Don’t use water. Don’t use cleaners. Just dry cloth. You’re removing dust, not polishing the equipment.
Contact cleaner for connections. Electronics contact cleaner is available at any hardware store for five to ten dollars. Spray a tiny bit on a cloth and wipe down RCA jacks, speaker terminals, and visible connection points. Let it dry completely before plugging anything in. To remove oxidation, use a brass toothbrush-style brush.
Be very careful inside. If you open the chassis, don’t touch circuit boards, components, or internal wiring. If you must blow dust off internal circuits, use compressed air on the low setting. No liquids inside. Moisture inside will cause corrosion.
Don’t use liquids on circuit boards. Some guides say to use isopropyl alcohol on circuit boards. I don’t recommend it unless you really know what you’re doing. Let a professional handle internal cleaning if it’s needed.
Common Cleaning Fixes
Crackling in one channel. Grab the affected RCA cable. Wiggle it where it plugs into the jack. Does the crackling change? That’s a dirty connection. Unplug it. Use contact cleaner. Plug it back in. Problem solved.
No sound from speakers. Check the speaker connections first. Make sure the cables are pushed in completely. If they’re loose or corroded, tighten them. If you see white or green corrosion on the terminals, use contact cleaner and a cloth to clean them. And look for loose wire strands.
Weird volume or frequency response. The volume knob might be dirty inside. Turn the knob back and forth a few times. Sometimes this clears dust out of the potentiometer. If that doesn’t work, compressed air into the knob shaft might help. Don’t force the knob or try to disassemble it.
Equipment powers on then shuts off. This often means overheating from dust blocking vents. Blow out all the cooling vents and fan areas with compressed air. Let the equipment cool down. Try again. If it stays on, it was a dust and heat issue.
When Cleaning Isn’t Enough
Sometimes you clean your vintage stereo, and nothing changes. The crackling is still there. No sound in one channel. Weak output.
That means you’ve got a real failure. A bad capacitor, a broken component, something internal that needs actual repair. That’s when you bring it to someone who can diagnose and fix it properly.
But you’ve eliminated the easy stuff. You’ve done proper vintage stereo maintenance. And you’ve shown a technician that this isn’t a simple cleaning job. That’s valuable information.
Preventive Maintenance Saves Repair Bills
The best time to clean your vintage stereo is before it sounds wrong. Once a year, blow out the dust. Wipe down the exterior. Check the connections. A few minutes of maintenance can prevent problems that cost hundreds to repair.
Dust and corrosion are slow killers. They degrade your vintage stereo gradually. By the time you notice something’s wrong, the damage is months old. Preventive cleaning keeps that from happening.
Your vintage equipment is worth maintaining. A few minutes with compressed air and contact cleaner is all it takes.
If you’ve cleaned your vintage stereo and it still isn’t working right, contact us for a diagnostic. We’ll find out what’s really going on and get it back to working condition.