Summer heat and humidity are two of the biggest threats to vintage electronics. If you own a vintage receiver, amplifier, turntable, or stereo system, where you store it this summer directly affects whether it works in the fall. The damage from heat and humidity builds up slowly and invisibly, and by the time you notice it, the repair bill is already waiting.
I’ve been doing this for 45+ years. Every fall, I see the same thing: equipment that worked fine in spring comes back from summer storage with blown capacitors, corroded circuit boards, and failed power supplies. Most of it was preventable.
Here is exactly what causes summer storage damage, where to store vintage electronics safely, and what you can do right now to protect your equipment.
Why Summer Heat Damages Vintage Electronics
Vintage electronics are especially vulnerable to heat because of the components inside, particularly capacitors. Capacitors contain electrolytic fluid. When temperatures climb, that fluid evaporates faster than it should. The capacitor dries out, its electrical properties change, and your equipment starts to fail.
The safe storage temperature for vintage electronics is below 75 degrees Fahrenheit. At 85 degrees, component aging accelerates significantly. At 95 degrees and above, active damage is happening. Attic temperatures in summer regularly hit 120 degrees or higher. That is not a storage environment. That is a destruction environment.
Heat also causes solder joints to develop microscopic cracks from thermal stress, and resistors to drift out of tolerance. These problems do not show up immediately. They show up in September when you try to power on your equipment.
Why Humidity Damages Vintage Electronics Even Faster
Heat alone is bad. Heat combined with humidity causes damage that is much harder to fix.
Moisture gets into circuit boards and causes corrosion on electrical traces and component leads. Once corrosion starts, it spreads. What looks like surface moisture in June has become active corrosion eating through connections by August.
Safe humidity levels for vintage electronics storage are below 50 percent, ideally below 40 percent. Basements in summer regularly exceed 70 to 80 percent relative humidity. Garages experience constant condensation from day-to-night temperature swings. Both are the wrong places for vintage audio equipment.
Where to Store Vintage Electronics in Summer
The best place to store vintage electronics in summer is inside your home, in a climate-controlled interior room, away from direct sunlight and away from exterior walls. Bedroom closets, hall closets, and interior rooms work well because they stay near your home’s air-conditioned temperature without the humidity swings of basements or garages.
Avoid these locations entirely:
Attics. Too hot. Summer attic temperatures regularly exceed 120 degrees Fahrenheit, which actively damages components.
Garages. Temperature and humidity swing too much. The condensation from daily cycles soaks into equipment over weeks and months.
Basements. Most basements get humid in summer. If your basement smells like concrete or moisture, it is pulling humidity out of the air and putting it into your equipment. The only exception is a basement with active climate control and consistently low humidity.
Practical Steps to Protect Vintage Electronics in Summer
Use desiccants. Silica gel packets absorb moisture. Place them near or inside the storage area where your vintage electronics are kept. They are inexpensive and effective. Replace them every month or two during summer months.
Do not seal equipment airtight. Airtight containers trap whatever moisture is in the air at the time you seal them. Use breathable cloth covers or store equipment uncovered with space for airflow.
Keep equipment off concrete. Concrete floors wick moisture from the ground and release it into the surrounding air. Store vintage electronics on shelves or furniture, never directly on a basement or garage floor.
Leave space between units. Air circulation prevents hot spots and moisture buildup. Leave a few inches of space between stored items rather than packing them tightly together.
Stay away from windows. Direct sunlight heats equipment quickly even indoors. Keep vintage electronics away from south-facing and west-facing windows during summer.
What to Do Before You Store Vintage Electronics for Summer
Before putting equipment into storage, power it on one final time and confirm it works correctly. If something sounds off, get it checked before summer storage. A component that is already weakening will not survive three months of heat and humidity.
Let equipment cool to room temperature before storing it. Do not put a warm amplifier directly into a cabinet or closet. The trapped heat will continue baking the components inside even after storage. Give it a few hours to cool first.
What Summer Storage Damage Actually Costs to Fix
When someone brings in a vintage amplifier after a summer in the attic or garage, the repair typically costs between $300 and $500. Sometimes more. That covers replacing all the dried and failed capacitors, repairing corroded board connections, and diagnosing secondary damage from the original failures.
A bag of silica gel packets costs under $15. Moving a piece of equipment from a garage to a bedroom closet costs nothing. The math is straightforward.
Summer Storage for Vintage Electronics: Quick Reference
Best storage location: Interior room, climate-controlled, away from sunlight
Avoid: Attics, garages, humid basements, exterior walls, direct sunlight
Use: Silica gel desiccants, breathable covers, elevated shelving
Before storing: Power on and test, then let cool to room temperature
Frequently Asked Questions
Can I store vintage electronics in the basement in summer?
Only if the basement is actively climate-controlled and stays below 50 percent relative humidity. Most basements do not meet that standard in summer. If it smells like moisture or concrete, it is not safe for vintage electronics storage.
Will a garage damage vintage electronics in summer?
Yes. Garages experience significant temperature swings between day and night that cause condensation and humidity buildup. Over a summer, that repeated moisture exposure causes corrosion inside the equipment.
How do I know if my vintage electronics were damaged by summer storage?
Common signs include failure to power on, audible hum or buzz, weak or distorted sound, crackling, and channels cutting out. These symptoms often appear in September or October after summer storage. A diagnostic appointment will confirm the cause.
What is the best way to protect vintage electronics from summer heat?
Store in a climate-controlled interior room below 75 degrees Fahrenheit and below 50 percent humidity. Use silica gel desiccants, keep equipment off concrete floors, leave airflow space, and avoid sealing equipment airtight.
Have vintage electronics that did not survive summer storage? Browse our serviced equipment or contact us to schedule a diagnostic appointment.
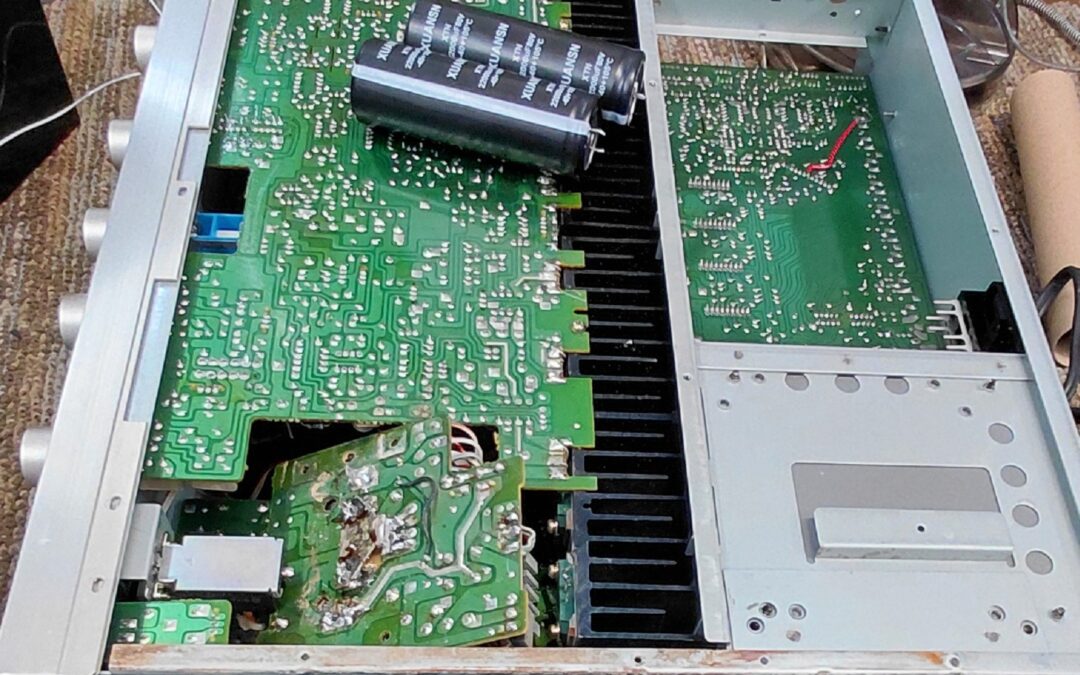
People ask me this all the time. They’ve got a vintage amplifier sitting in the living room, it sounds great, and they’re curious: what’s actually going on inside this thing? It’s a fair question, and once you understand what’s in there, you start to appreciate why these machines sound the way they do and why they’re worth taking care of.
After 45+ years of working on vintage audio equipment, I’ve opened up more of these than I can count. Here’s what you’re looking at.
The Power Supply: Where It All Starts
The power supply is usually the first thing you see when you open up a vintage amplifier. It’s not the glamorous part (it doesn’t touch the sound directly), but everything else in the unit depends on it.
Its job is to take the AC power coming out of your wall and convert it into clean, stable DC power that the rest of the amplifier can actually use. It does this through a transformer, a rectifier, and a set of filter capacitors. The transformer steps the voltage down, the rectifier converts AC to DC, and the capacitors smooth everything out so the power is stable.
The reason this matters is that those capacitors age over time. The material inside them breaks down, they lose their ability to hold a charge, and the power supply starts delivering uneven voltage to the rest of the circuit. When that happens, you might hear a hum, notice the bass sounds weak, or find that the unit shuts off when you push it. The power supply is almost always where I start when something seems off.
The Preamp Section: Where Your Signal Comes In
Once the power supply is doing its job, the signal from your source (your turntable, tuner, whatever you’re running) comes in through the preamp section. That signal starts very small, and the preamp’s job is to amplify it enough to feed it into the power section.
This is also where your tone controls live. When you adjust the bass or treble, you’re adjusting circuits inside the preamp that boost or cut certain frequencies before the signal moves on.
What makes the preamp section tricky is that small problems here have a big effect on the sound. A capacitor that’s drifted out of spec, a resistor that’s reading a little off: the amplifier keeps playing, nothing dramatic happens, but the sound isn’t quite right. Channel balance, frequency response, clarity: all of it can be affected by something as small as one component that’s no longer within its rated tolerance. This is why proper diagnosis matters. These aren’t problems that announce themselves.
The Power Amp Section: Where the Signal Becomes Sound
The power amp section takes the signal from the preamp and amplifies it to the point where it can actually drive a speaker: move the cone back and forth and create sound you can hear across a room. This section is doing the heavy lifting, and it generates real heat in the process.
That’s why ventilation matters on these units. The components in the power amp section are running at higher voltages and currents than anywhere else in the amplifier. If airflow is blocked and heat builds up, things wear out faster.
Many vintage amplifier designs also include output transformers in this section. Their job is to match the amplifier’s output to the impedance of your speakers. When an output transformer goes bad, the amplifier can appear perfectly functional (powers on, no obvious issues) but it won’t drive speakers properly. That gets misdiagnosed as a speaker problem more often than you’d think.
There are also bias circuits here, which set the operating point for the amplifying components. When the bias drifts, which it does over time, the amplifier can run hotter than it should, start to distort, or become unstable. Checking and adjusting the bias is a standard part of a proper service on any vintage amplifier.
The Speaker Output: The Last Step
This is where the amplified signal leaves the unit and heads to your speakers. Pretty straightforward, but there are a couple of things worth knowing.
Impedance matching is one of them. Connecting speakers with the wrong impedance to a vintage amplifier puts extra stress on the output section, and over time, that can cause damage. It’s worth knowing what your amplifier is rated for and making sure your speakers match.
A lot of vintage designs also include output relays, small switches that connect or disconnect the speakers automatically at startup and shutdown to protect them from voltage spikes. When those relays get dirty or oxidized, the amplifier powers up normally, but no sound comes out. It’s a common issue, and it’s a straightforward fix once you know what you’re dealing with.
Capacitors and Resistors: The Parts Nobody Talks About
Throughout every section of a vintage amplifier, you’ve got hundreds of smaller components (capacitors and resistors) that most people never think about. They don’t amplify anything on their own, but they control how the signal moves through every part of the circuit. They set current levels, filter noise, block DC from areas where it doesn’t belong, and couple the signal between stages.
These components age, and they do it quietly. Resistors drift away from their rated value. Capacitors lose capacitance or develop internal resistance. The changes are gradual, which is why a vintage amplifier that still plays music might sound noticeably different from the same model that’s been properly serviced. The performance has been slipping for years. The owner just doesn’t have anything to compare it against.
When I do component-level repair, a lot of the work is here. The goal isn’t to replace everything. It’s to find the specific parts that have moved outside their rated spec and replace those. That’s what separates a proper repair from just throwing parts at something and hoping it improves.
Why This Is Worth Understanding
Knowing what’s inside a vintage amplifier changes how you think about owning one. You understand why a unit that’s been sitting for 20 years might need service even if it turns on. You understand why heat management matters. You know that a hum or a channel imbalance isn’t necessarily a speaker issue, and you know what to tell a technician when you bring something in.
These are well-engineered machines. Every component in there has a purpose, and when something fails, it affects the whole chain. That’s exactly why they’re worth repairing correctly, not just getting them to turn on, but getting the whole signal path performing the way it was designed to.
Frequently Asked Questions About Vintage Amplifier Components
What are the main components inside a vintage amplifier?
A vintage amplifier has five main systems: the power supply (transformer, rectifier, filter capacitors), the preamp section (signal input, tone controls, coupling components), the power amp section (amplifying devices, bias circuits, output transformers), the speaker output stage, and passive components (resistors and capacitors) running through every part of the circuit.
Why do vintage amplifiers fail as they age?
Capacitor aging is the most common cause. Electrolytic capacitors lose capacitance and increase internal resistance over time, which affects both the power supply and the signal path. Resistors also drift out of tolerance. These changes accumulate over decades, which is why a vintage amplifier that still powers on may be performing well below its original spec.
What does component-level repair mean for a vintage amplifier?
It means diagnosing and replacing specific failed or degraded parts (individual capacitors, resistors, transistors) rather than swapping out entire boards. It requires proper test equipment to measure each component against its rated spec. Done right, it returns the amplifier to its original performance without replacing parts that don’t actually need it.
How do I know if my vintage amplifier needs repair?
Common signs include a persistent hum, one channel sounding different from the other, distortion at certain volume levels, intermittent cutting out, or a relay click at startup with no audio output. Each of those symptoms points toward a specific part of the circuit. A proper diagnosis identifies the exact component causing the problem rather than guessing at it.
Does a vintage amplifier need service if it still turns on?
Turning on and performing correctly are two different things. A vintage amplifier that hasn’t been serviced in 30 or 40 years has aged capacitors, drifted resistors, and worn connections, even if it’s still making sound. A proper service brings it back to what it was designed to do. For an amplifier worth keeping, that’s a meaningful difference.
Have a vintage amplifier you’re not sure about? Contact us for a straight answer on what it needs, or browse our serviced equipment to see what properly repaired vintage audio looks like.
Buying vintage audio online is like finding buried treasure. You’re scrolling Facebook Marketplace at midnight, and there it is, a beautiful vintage receiver for a price that seems too good to be true. The photos look perfect. The seller says “works great” or “just needs some TLC.”
But here’s what I know from 45+ years in the vintage audio repair business: those words are code for something else. When you’re buying vintage audio without knowing what to look for, you’re taking a serious risk. I’ve seen people spend good money on units that looked perfect in photos but had major problems underneath.
After 45+ years, I can spot the warning signs instantly. The red flags that separate a real find from a money pit. If you’re buying vintage audio, you need to know these. Here they are.
RED FLAG #1 When Buying Vintage Audio: “I Don’t Have Speakers to Test It”
When buying vintage audio online, you ask the seller, “Does it actually work?” They come back with: “Well, I don’t have speakers to test it, but I’m pretty sure it does.”
They don’t know if it works.
This is one of the biggest problems when buying vintage audio sight unseen. A receiver that won’t power on looks identical to one that works fine from the outside. Same with one that has a shorted output that will blow your speakers if you plug them in. You can’t tell the difference without actually testing it. That’s why testing matters so much when buying vintage audio.
What to do: Before you commit to buying vintage audio from someone, ask the seller for a video showing it powered on and producing sound. This saves you time and travel. When buying vintage audio this way, video proof is non-negotiable.
Most meetups for buying vintage audio happen in safe public places: a parking lot, police department, or somewhere neutral. You won’t be able to test anything there. So think ahead before you go. If a seller won’t send you a video when you’re buying vintage audio, that’s a red flag right there. Walk away, or knock the price down hard because you’re buying something you don’t know anything about. It might work fine, or it might need serious work.
RED FLAG #2 When Buying Vintage Audio: The Mysterious Smell
When you’re buying vintage audio equipment, smell is one of your best diagnostic tools. If it smells hot, burnt, like melting plastic, or has that chemical smell of burnt resistors or leaking capacitors, stop immediately. Even pet smells or mildew are a major concern when buying vintage audio. That’s not just cosmetic: it’s a sign of serious internal problems.
That smell is your warning. Something inside is failing. Burnt resistors mean the circuit board is getting too much heat. Leaking capacitors are breaking down. Transformers overheat. When buying vintage audio, pet odors and mildew smells mean the unit was exposed to moisture and dander, and that gets inside everything. If you see rusted screws on the back, you’ll likely smell that mildew. Rust on the outside means corrosion on the inside too. This matters when buying vintage audio because moisture damage spreads.
What to do: Don’t plug it in. Don’t take it home. Don’t try to negotiate on price, thinking you’ll fix it later. The repair cost will be serious, and you’ve just invited a potential fire hazard into your house.
RED FLAG #3 When Buying Vintage Audio: Humming or Buzzing Sound
A properly functioning vintage receiver should be mostly quiet when it’s on. Maybe a tiny hum, but nothing you notice. This is important to listen for when buying vintage audio equipment.
If there’s an audible hum or buzz, especially one that gets louder when you turn up the volume, that tells me the power supply or transformer is failing. This is a critical warning sign when buying vintage audio because it means major internal components are breaking down.
Some people think it’s “character.” It’s not. It’s a component about to fail. When buying vintage audio, don’t let anyone convince you that noise is normal.
What to do: Don’t ignore it. If the seller says, “It’s always done that,” when you’re buying vintage audio, that means it’s been broken the entire time they owned it. Walk away or price it significantly lower as a repair project.
RED FLAG #4 When Buying Vintage Audio: Cosmetic Damage That Hides Real Problems
When buying vintage audio, cosmetic condition tells you a lot about how the unit was treated internally. Beautiful exterior case, but all the knobs are missing. The faceplate is cracked. The back panel is corroded.
If someone let the cosmetics go that badly, what happened to the inside? This is the question you need to ask yourself when buying vintage audio equipment.
Corrosion on the back panel means moisture got in. That means corrosion inside, too. Corroded circuit boards don’t work reliably. And once corrosion starts, it spreads. This is especially concerning when buying vintage audio because internal corrosion can be hidden but deadly to performance.
What to do: When buying vintage audio, assume cosmetic neglect means internal neglect. Price your offer accordingly, or walk away entirely.
RED FLAG #5 When Buying Vintage Audio: Vague Answers About History
“Where was it stored?” “I don’t know, my cousin gave it to me.” “Has it ever been serviced?” “I have no idea.” These are the answers you don’t want to hear when buying vintage audio.
“When was the last time it actually worked?” “Probably a few years ago?” This is another major red flag when buying vintage audio online.
If the seller can’t tell you anything about where the unit lived or what its history is, you’re flying blind when buying vintage audio. You don’t know if it was in a basement (moisture damage), an attic (heat damage), or a garage (temperature swings that destroy capacitors). History matters when buying vintage audio equipment because storage conditions determine lifespan.
What to do: When buying vintage audio, assume worst-case storage conditions. Moisture, heat, neglect. Price your offer to account for that risk.
The Checklist for Buying Vintage Audio
Before you buy any vintage audio equipment, ask yourself:
Does it power on?
Does it produce sound from both channels?
Are the knobs smooth and responsive?
Does it smell normal?
Is there any visible corrosion inside or out?
Can you get any history of where it lived?
Does the seller know anything about it?
If you answer “no” or “I don’t know” to more than two of these, you’re buying a repair project. Price it accordingly.
We’re not trying to scare you away from buying vintage audio. Just keep in mind that any vintage purchase could lead to a repair. Know what you’re getting into before you hand over your money when buying vintage audio.
The Real Talk About Buying Vintage Audio
Most vintage audio deals that seem too good to be true are just that.
Someone is either hiding a problem, doesn’t know there’s a problem, or is hoping you won’t notice.
The people who sell working, well-maintained vintage equipment know what they have. They price it fairly. When you’re buying vintage audio from someone who knows their equipment, the deal reflects that knowledge. The deals that look amazing usually look amazing because something is seriously wrong.
Test before you buy when buying vintage audio. Get answers before you buy. Walk away if something feels off. These three rules will save you from expensive mistakes when buying vintage audio.
And if you do end up with a unit that needs work, bring it to someone who knows what they’re looking at. A diagnostic fee upfront will save you from a major repair bill you didn’t expect.
Ready to find quality vintage audio equipment that’s been properly serviced? Browse our vintage audio collection to see what properly serviced pieces look like. We know what to look for because we’ve been doing this for 45+ years.
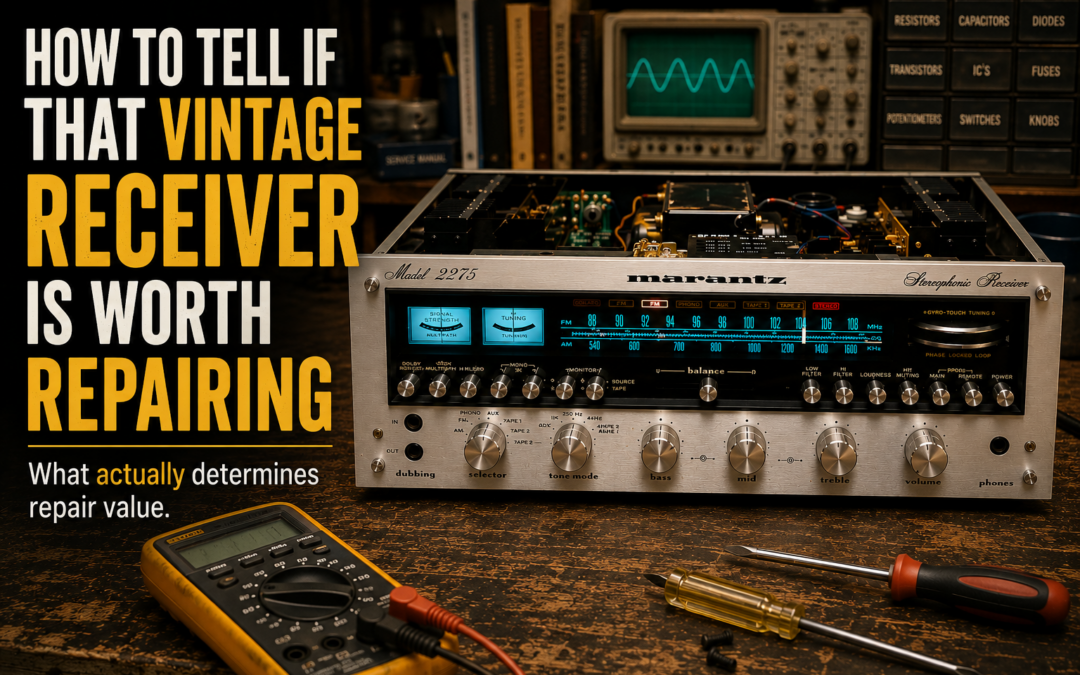
Whether a vintage receiver is worth repairing depends on five things. Most people only think about one of them, and it’s usually not the most important one.
You found it at an estate sale. The case is pristine, and you’re convinced it just needs a little work. Then you plug it in, and nothing happens. Or it powers on, but there’s no sound, the knobs are stiff, something smells faintly hot. I hear this every week. Someone walks in with a vintage receiver, torn between what they love about it and what they don’t know about what fixing it will actually cost. The honest answer: sometimes yes, sometimes no. And the deciding factor isn’t what you think.
The Real Question Isn’t “Can It Be Fixed?”
It’s “Should it be?”
Almost anything can be repaired if you throw enough money at it. Old capacitors can be replaced, transformers can be rewound, and corroded circuit boards can be cleaned. But just because something can be fixed doesn’t mean it should be. I’ve been doing this for 45+ years, and the best repairs are the ones that make financial and practical sense.
Here’s How I Evaluate It
When someone brings in a receiver, I ask myself five questions:
1. What’s the actual problem?
There’s a big difference between a unit that won’t power on and one that powers on but sounds terrible. A bad capacitor? Fixable, maybe $50–200 in parts. A transformer that’s shorted out? That’s a different conversation. Parts alone could run $300–600, plus labor.
I need to diagnose it first. That’s why we charge a diagnostic fee. It’s not to nickel-and-dime you. It’s to give you real information before you make a decision.
2. What year/model is it?
A 1970s Marantz or Sansui? Those are built like tanks, and parts are often available. A 1990s budget model from a brand that went out of business 20 years ago? That’s a problem. If the power supply fails and the exact replacement transformer isn’t available, you’re looking at custom rewinding or expensive workarounds.
3. Is this a popular model?
Certain receivers are legendary. They hold their value. A Marantz 2270 or a Sansui 8080 is worth fixing because people want them, parts exist, and they sound incredible. A random no-name brand receiver? If it costs $400 to repair, and you can buy a working used version for $250, the math is simple.
4. What’s your emotional attachment?
I’m not being sarcastic. This matters. If your grandfather owned this receiver and you want to restore it, that’s a valid reason to spend more than the “logical” amount. Sentimental value is real value. But I need you to go in with your eyes open about what it will cost. If you picked it up because it was cheap and you thought you’d flip it, then we need to talk about the real repair cost versus resale value.
5. Can you actually use it when it’s fixed?
This one surprises people. I’ve fixed receivers where the output is only 15 watts, which sounds like nothing to modern ears used to 100-watt systems. Some units have no remote. Some have quirky features that nobody likes. If this costs $300 to repair, ask yourself honestly: Will I actually use it? Or will it sit in my closet?
Here’s What It Typically Costs
Let me give you real numbers based on what I see every day:
Simple repairs (cleaning, loose connections, minor part replacement): $50–150 These are usually old capacitors that are losing effectiveness, or switches that need cleaning Quick turnaround, big improvement in sound quality
Moderate repairs (capacitor replacement, tube replacement, minor board work): $150–400 You’re replacing aging components that are failing This is the most common repair we do Usually brings a receiver back to like-new condition
Major repairs (transformer issues, extensive board work, hard-to-find parts): $400–$1,000+ These take time and specialized knowledge We might need to source parts from multiple suppliers Could take 2–3 weeks if we’re waiting on a specific part
Don’t – fix – it territory ($1,000+): This is when the repair cost exceeds the realistic market value of the unit. Unless there’s serious sentimental value, it doesn’t make financial sense.
The Real Cost You’re Not Thinking About
Repair isn’t just parts and labor. Your receiver might sit on my workbench for 2–3 weeks while I wait for a specific part. There’s real expertise involved in diagnosing vintage electronics, and there’s always the risk that once I open it up, I find additional problems we didn’t anticipate.
And there’s no guarantee. If a vintage component fails after we repair it, we can only control what we did. We can’t control how that unit was stored for the last 30 years.
So Here’s My Advice
Bring it in for a diagnostic. That costs about $50–75, and it gives you real information before you make any decision.
Don’t guess. Don’t hope. Don’t assume.
You’ll know what’s broken, what it will cost to fix, how long it will take, and whether it makes sense to proceed. Then you decide. Some people will say, “Yes, fix it. It was my dad’s receiver.” Others will say, “No thanks, I can buy a working one cheaper.” Both answers are right. You just need the facts first.
The worst repair decision is the one made without information. The second-worst is deciding to fix something that doesn’t make sense financially, then being surprised when it costs more than expected.
Get the diagnosis. Look at the numbers. Then decide. That’s how you know if that beautiful vintage receiver sitting in your garage is worth fixing.
What’s sitting in your basement or garage that you’ve been wondering about? Send us a message before you bring it in. We’ll tell you straight.
One of the most common questions we get is some version of: “How much is this going to cost me?”
It’s a fair question. Nobody wants to drop off their receiver and get hit with a surprise number. So let’s talk about it honestly.
There’s No Flat Rate — Here’s Why
Vintage electronics are not like changing your oil. Every unit is different. A Sansui receiver from 1975 has different components, different failure points, and different parts availability than a Rotel amplifier from the 1990s. What one unit needs — and what it takes to get it right — varies every single time.
That’s not a dodge. That’s just the reality of working on equipment that’s 30, 40, or 50 years old.
What You’re Actually Paying For
Diagnostic work. Before anything else, we need to figure out what’s actually wrong. That takes time and experience. We charge a diagnostic fee — and it’s typically lower than what you’ll find at a lot of other shops. We hear this regularly from customers who’ve been quoted elsewhere. If you approve the repair, that fee gets applied toward the total cost.
Parts. Some parts are easy to find. Others require sourcing from specialty suppliers, waiting on shipments, or tracking down components that simply aren’t made anymore. The cost and availability of parts directly affect what a repair runs.
Repair time. Straightforward repairs take less time. More complex issues — especially in older units with multiple failing components — take more. We don’t cut corners to speed things up, because that’s how you end up with a unit that works fine for a few months and then fails again.
Burn-in testing. Once the repair is done, we run the unit under load to confirm it’s performing the way it should before it leaves the shop. That step matters.
You Always Know the Cost Before We Proceed
Once we’ve diagnosed the unit, Dan calls you directly. He’ll explain what’s going on, what it needs, and what the repair will cost. You decide whether it’s worth it to you — no pressure, no assumptions.
If you want to move forward, great. If not, you pay the diagnostic fee and take your unit back. Either way, nothing happens without your approval first.
This is one of the things that separates us from shops that just do the work and hand you a bill.
Is a Deposit Required?
Not always. It depends on the situation. We’ll be straightforward with you about that when we talk through your repair.
When Do You Pay?
Payment is due at pickup, which — like drop-off — is always by appointment.
One thing worth mentioning: we’re a home-based shop with limited space. Between units being worked on and the inventory we have available for sale, our workspace fills up fast. That’s part of why we control intake carefully and schedule drop-offs the way we do. Once your repair is complete and you’ve been notified, we do ask that pickup happens in a reasonable timeframe. We’ve never had to push anyone on it, but it’s worth knowing upfront.
How Long Will It Take?
It depends on the unit and what it needs. Parts availability is often the biggest variable. Once we’ve had a chance to evaluate your equipment, we’ll give you an honest estimate — and we’ll keep you in the loop if anything changes along the way.
The Bottom Line
We know repairs can cost more than people expect. That’s partly because good repair work takes real time and real expertise — and partly because it hasn’t always been explained clearly.
We’d rather have that conversation up front. If you’ve got questions about a specific piece of gear before you commit to anything, reach out. We’re happy to talk it through.